AWS Trainium 和 Inferentia 文档
在 AWS Inferentia 上使用 Stable Diffusion 模型生成图像
并获得增强的文档体验
开始使用
在 AWS Inferentia 上使用 Stable Diffusion 模型生成图像
Stable Diffusion
该教程有一个 notebook 版本,请点击此处查看.
🤗 Optimum 扩展了 Diffusers,以支持在第二代 Neuron 设备(由 Trainium 和 Inferentia 2 驱动)上进行推理。它的目标是继承 Diffusers 在 Neuron 上的易用性。
首先,请确保您已配置了 inf2 / trn1 实例,并安装了 optimum
pip install optimum-neuron[neuronx] diffusers
编译 Stable Diffusion
要部署模型,您需要将它们编译为针对 AWS Neuron 优化的 TorchScript。 对于 Stable Diffusion,有四个组件需要导出为 .neuron 格式以提高性能
- 文本编码器
- U-Net
- VAE 编码器
- VAE 解码器
您可以通过 CLI 或 NeuronStableDiffusionPipeline 类来编译和导出 Stable Diffusion 检查点。
通过 CLI 导出
这是一个使用 Optimum CLI 导出 stable diffusion 组件的示例
optimum-cli export neuron --model stabilityai/stable-diffusion-2-1-base \
  --batch_size 1 \
  --height 512 `# height in pixels of generated image, eg. 512, 768` \
  --width 512 `# width in pixels of generated image, eg. 512, 768` \
  --num_images_per_prompt 1 `# number of images to generate per prompt, defaults to 1` \
  --auto_cast matmul `# cast only matrix multiplication operations` \
  --auto_cast_type bf16 `# cast operations from FP32 to BF16` \
  sd_neuron/
我们建议使用 inf2.8xlarge 或更大的实例进行模型编译。您也可以在仅 CPU 实例上使用 Optimum CLI 编译模型(需要约 35 GB 内存),然后在 inf2.xlarge 上运行预编译模型以减少开销。在这种情况下,请不要忘记添加 --disable-validation 参数来禁用推理验证。
通过 Python API 导出
这是一个使用 NeuronStableDiffusionPipeline 导出 stable diffusion 组件的示例
要应用优化的 Unet 注意力分数计算,请使用 export NEURON_FUSE_SOFTMAX=1 配置您的环境变量。
此外,请随时调整编译配置,以在您的用例中找到性能与准确性之间的最佳权衡。 默认情况下,我们建议将 FP32 矩阵乘法运算转换为 BF16,这在适度牺牲准确性的情况下提供了良好的性能。 请查阅 AWS Neuron 文档 中的指南,以更好地了解您的编译选项。
>>> from optimum.neuron import NeuronStableDiffusionPipeline

>>> model_id = "runwayml/stable-diffusion-v1-5"
>>> compiler_args = {"auto_cast": "matmul", "auto_cast_type": "bf16"}
>>> input_shapes = {"batch_size": 1, "height": 512, "width": 512}

>>> stable_diffusion = NeuronStableDiffusionPipeline.from_pretrained(model_id, export=True, **compiler_args, **input_shapes)

# Save locally or upload to the HuggingFace Hub
>>> save_directory = "sd_neuron/"
>>> stable_diffusion.save_pretrained(save_directory)
>>> stable_diffusion.push_to_hub(
...     save_directory, repository_id="my-neuron-repo", use_auth_token=True
... )
文本到图像
NeuronStableDiffusionPipeline 类允许您在 neuron 设备上从文本提示生成图像,类似于使用 Diffusers 的体验。
使用预编译的 Stable Diffusion 模型,现在在 Neuron 上使用提示生成图像
>>> from optimum.neuron import NeuronStableDiffusionPipeline

>>> stable_diffusion = NeuronStableDiffusionPipeline.from_pretrained("sd_neuron/")
>>> prompt = "a photo of an astronaut riding a horse on mars"
>>> image = stable_diffusion(prompt).images[0]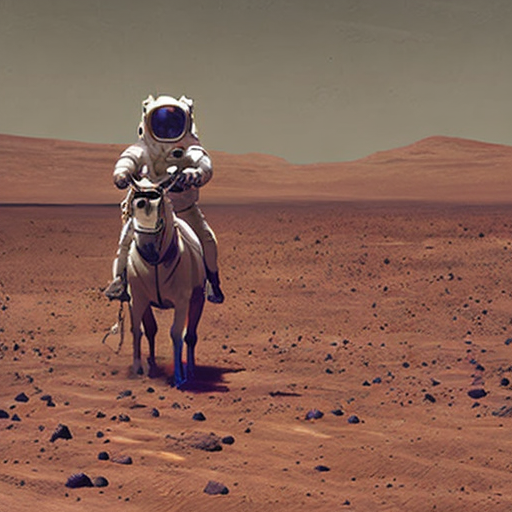
图像到图像
使用 NeuronStableDiffusionImg2ImgPipeline 类,您可以生成以文本提示和初始图像为条件的新图像。
import requests
from PIL import Image
from io import BytesIO
from optimum.neuron import NeuronStableDiffusionImg2ImgPipeline

# compile & save
model_id = "nitrosocke/Ghibli-Diffusion"
input_shapes = {"batch_size": 1, "height": 512, "width": 512}
pipeline = NeuronStableDiffusionImg2ImgPipeline.from_pretrained(model_id, export=True, **input_shapes)
pipeline.save_pretrained("sd_img2img/")

url = "https://raw.githubusercontent.com/CompVis/stable-diffusion/main/assets/stable-samples/img2img/sketch-mountains-input.jpg"

response = requests.get(url)
init_image = Image.open(BytesIO(response.content)).convert("RGB")
init_image = init_image.resize((512, 512))

prompt = "ghibli style, a fantasy landscape with snowcapped mountains, trees, lake with detailed reflection. sunlight and cloud in the sky, warm colors, 8K"

image = pipeline(prompt=prompt, image=init_image, strength=0.75, guidance_scale=7.5).images[0]
image.save("fantasy_landscape.png")
图像 | 提示 | 输出 | |
|---|---|---|---|
 | 吉卜力风格,奇幻景观,有雪山、树木、湖泊和详细的倒影。暖色调,8K |  |
图像修复
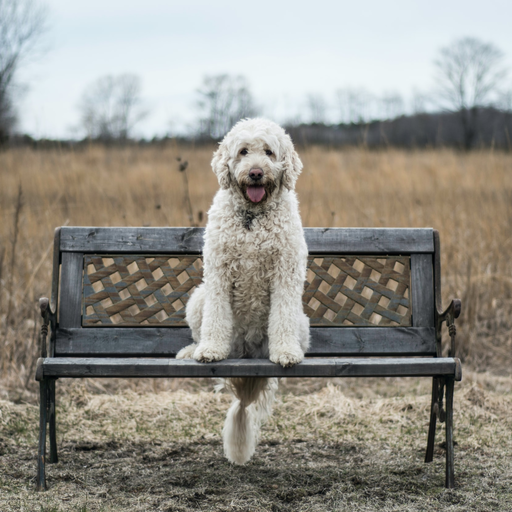
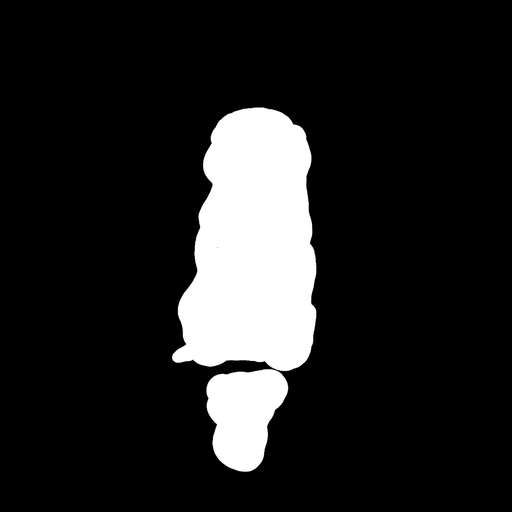
使用 NeuronStableDiffusionInpaintPipeline 类,您可以通过提供蒙版和文本提示来编辑图像的特定部分。
import requests
from PIL import Image
from io import BytesIO
from optimum.neuron import NeuronStableDiffusionInpaintPipeline

model_id = "runwayml/stable-diffusion-inpainting"
input_shapes = {"batch_size": 1, "height": 512, "width": 512}
pipeline = NeuronStableDiffusionInpaintPipeline.from_pretrained(model_id, export=True, **input_shapes)
pipeline.save_pretrained("sd_inpaint/")

def download_image(url):
    response = requests.get(url)
    return Image.open(BytesIO(response.content)).convert("RGB")

img_url = "https://raw.githubusercontent.com/CompVis/latent-diffusion/main/data/inpainting_examples/overture-creations-5sI6fQgYIuo.png"
mask_url = "https://raw.githubusercontent.com/CompVis/latent-diffusion/main/data/inpainting_examples/overture-creations-5sI6fQgYIuo_mask.png"

init_image = download_image(img_url).resize((512, 512))
mask_image = download_image(mask_url).resize((512, 512))

prompt = "Face of a yellow cat, high resolution, sitting on a park bench"
image = pipeline(prompt=prompt, image=init_image, mask_image=mask_image).images[0]
image.save("cat_on_bench.png")
图像 | 蒙版图像 | 提示 | 输出 |
|---|---|---|---|
 |  | 黄色猫的脸,高分辨率,坐在公园的长椅上 |  |
InstructPix2Pix
使用 NeuronStableDiffusionInstructPix2PixPipeline 类,您可以使用文本指导和图像指导来应用基于指令的图像编辑。
import requests
import PIL
from io import BytesIO
from optimum.neuron import NeuronStableDiffusionInstructPix2PixPipeline

def download_image(url):
    response = requests.get(url)
    return PIL.Image.open(BytesIO(response.content)).convert("RGB")

model_id = "timbrooks/instruct-pix2pix"
input_shapes = {"batch_size": 1, "height": 512, "width": 512}

pipe = NeuronStableDiffusionInstructPix2PixPipeline.from_pretrained(
  model_id, export=True, dynamic_batch_size=True, **input_shapes,
)
pipe.save_pretrained("sd_ip2p/")

img_url = "https://huggingface.co/datasets/diffusers/diffusers-images-docs/resolve/main/mountain.png"
init_image = download_image(img_url).resize((512, 512))

prompt = "Add a beautiful sunset"
image = pipe(prompt=prompt, image=init_image).images[0]
image.save("sunset_mountain.png")
图像 | 提示 | 输出 |
|---|---|---|
 | 添加美丽的日落 |  |
Stable Diffusion XL
该教程有一个 notebook 版本,请点击此处查看.
Stable Diffusion XL (SDXL) 是用于文本到图像的潜在扩散模型。 与以前版本的 Stable Diffusion 模型相比,它通过更大的 UNet 提高了生成图像的质量。
编译 Stable Diffusion XL
要部署 SDXL 模型,我们也将从编译模型开始。 我们支持导出管道中的以下组件以提高速度
- 文本编码器
- 第二文本编码器
- U-Net(比 Stable Diffusion 管道中的 UNet 大三倍)
- VAE 编码器
- VAE 解码器
通过 CLI 导出
这是一个使用 Optimum CLI 导出 SDXL 组件的示例
optimum-cli export neuron --model stabilityai/stable-diffusion-xl-base-1.0 \
  --batch_size 1 \
  --height 1024 `# height in pixels of generated image, eg. 768, 1024` \
  --width 1024 `# width in pixels of generated image, eg. 768, 1024` \
  --num_images_per_prompt 1 `# number of images to generate per prompt, defaults to 1` \
  --auto_cast matmul `# cast only matrix multiplication operations` \
  --auto_cast_type bf16 `# cast operations from FP32 to BF16` \
  sd_neuron_xl/
我们建议使用 inf2.8xlarge 或更大的实例进行模型编译。 您也可以在仅 CPU 实例上使用 Optimum CLI 编译模型(需要约 92 GB 内存),然后在 inf2.xlarge 上运行预编译模型以减少开销。 在这种情况下,请不要忘记添加 --disable-validation 参数来禁用推理验证。
通过 Python API 导出
这是一个使用 NeuronStableDiffusionXLPipeline 导出 stable diffusion 组件的示例
>>> from optimum.neuron import NeuronStableDiffusionXLPipeline

>>> model_id = "stabilityai/stable-diffusion-xl-base-1.0"
>>> compiler_args = {"auto_cast": "matmul", "auto_cast_type": "bf16"}
>>> input_shapes = {"batch_size": 1, "height": 1024, "width": 1024}

>>> stable_diffusion_xl = NeuronStableDiffusionXLPipeline.from_pretrained(model_id, export=True, **compiler_args, **input_shapes)

# Save locally or upload to the HuggingFace Hub
>>> save_directory = "sd_neuron_xl/"
>>> stable_diffusion_xl.save_pretrained(save_directory)
>>> stable_diffusion_xl.push_to_hub(
...     save_directory, repository_id="my-neuron-repo", use_auth_token=True
... )
文本到图像
使用预编译的 SDXL 模型,现在在 Neuron 上使用文本提示生成图像
>>> from optimum.neuron import NeuronStableDiffusionXLPipeline

>>> stable_diffusion_xl = NeuronStableDiffusionXLPipeline.from_pretrained("sd_neuron_xl/")
>>> prompt = "Astronaut in a jungle, cold color palette, muted colors, detailed, 8k"
>>> image = stable_diffusion_xl(prompt).images[0]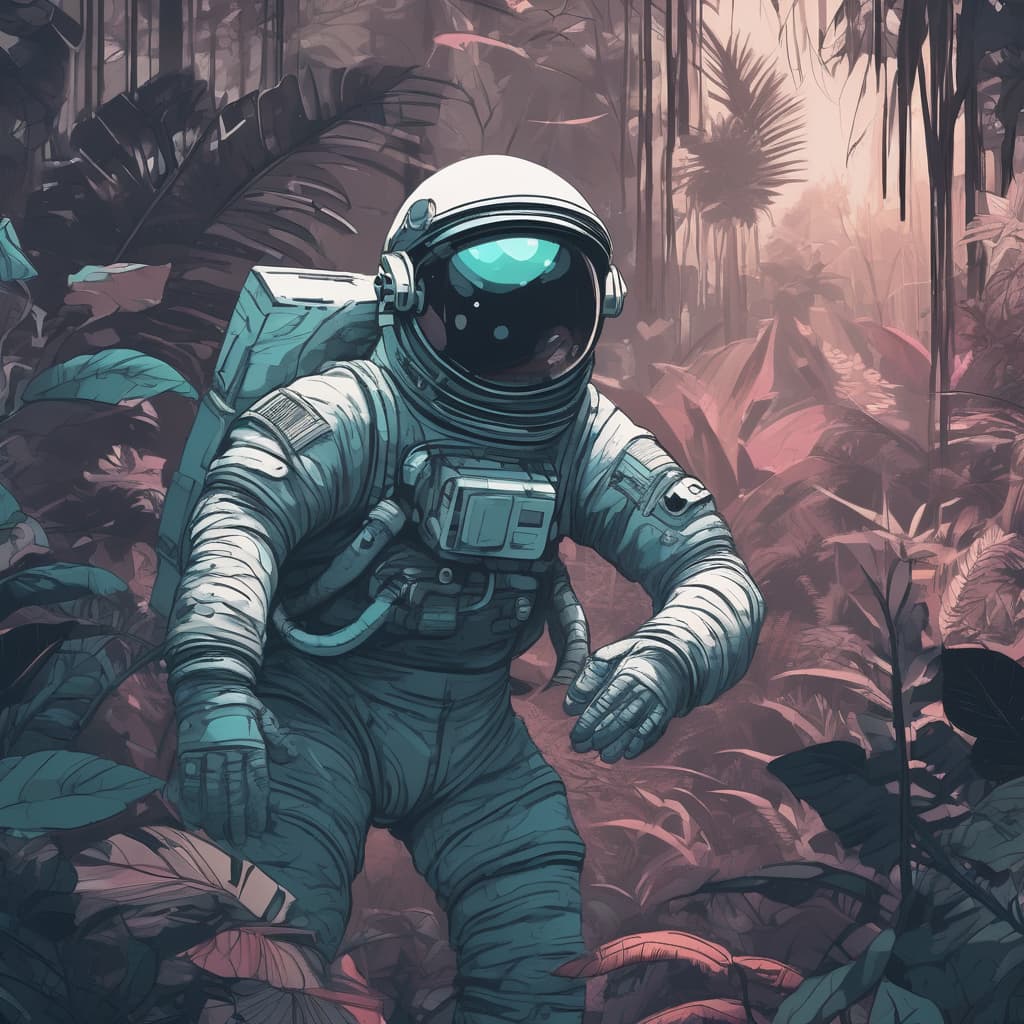
图像到图像
使用 NeuronStableDiffusionXLImg2ImgPipeline,您可以传递初始图像和文本提示来调节生成的图像
from optimum.neuron import NeuronStableDiffusionXLImg2ImgPipeline
from diffusers.utils import load_image

prompt = "a dog running, lake, moat"
url = "https://huggingface.co/datasets/optimum/documentation-images/resolve/main/intel/openvino/sd_xl/castle_friedrich.png"
init_image = load_image(url).convert("RGB")

pipe = NeuronStableDiffusionXLImg2ImgPipeline.from_pretrained("sd_neuron_xl/")
image = pipe(prompt=prompt, image=init_image).images[0]
图像 | 提示 | 输出 | |
|---|---|---|---|
 | 一只奔跑的狗,湖泊,护城河 |  |
图像修复
使用 NeuronStableDiffusionXLInpaintPipeline,传递原始图像和要替换的原始图像部分的蒙版。 然后用提示中描述的内容替换蒙版区域。
from optimum.neuron import NeuronStableDiffusionXLInpaintPipeline
from diffusers.utils import load_image

img_url = "https://huggingface.co/datasets/huggingface/documentation-images/resolve/main/diffusers/sdxl-text2img.png"
mask_url = (
    "https://huggingface.co/datasets/huggingface/documentation-images/resolve/main/diffusers/sdxl-inpaint-mask.png"
)

init_image = load_image(img_url).convert("RGB")
mask_image = load_image(mask_url).convert("RGB")
prompt = "A deep sea diver floating"

pipe = NeuronStableDiffusionXLInpaintPipeline.from_pretrained("sd_neuron_xl/")
image = pipe(prompt=prompt, image=init_image, mask_image=mask_image, strength=0.85, guidance_scale=12.5).images[0]
图像 | 蒙版图像 | 提示 | 输出 |
|---|---|---|---|
 |  | 一个漂浮的深海潜水员 |  |
优化图像质量
SDXL 包含一个 优化模型,用于对基础模型生成的低噪声阶段图像进行去噪。 有两种使用优化模型的方法
- 一起使用基础模型和优化模型来生成优化后的图像。
- 使用基础模型生成图像,然后使用优化模型为图像添加更多细节。
基础模型 + 优化模型
from optimum.neuron import NeuronStableDiffusionXLPipeline, NeuronStableDiffusionXLImg2ImgPipeline

prompt = "A majestic lion jumping from a big stone at night"
base = NeuronStableDiffusionXLPipeline.from_pretrained("sd_neuron_xl/")
image = base(
    prompt=prompt,
    num_inference_steps=40,
    denoising_end=0.8,
    output_type="latent",
).images[0]
del base  # To avoid neuron device OOM

refiner = NeuronStableDiffusionXLImg2ImgPipeline.from_pretrained("sd_neuron_xl_refiner/")
image = refiner(
    prompt=prompt,
    num_inference_steps=40,
    denoising_start=0.8,
    image=image,
).images[0]
基础模型到优化模型
from optimum.neuron import NeuronStableDiffusionXLPipeline, NeuronStableDiffusionXLImg2ImgPipeline

prompt = "A majestic lion jumping from a big stone at night"
base = NeuronStableDiffusionXLPipeline.from_pretrained("sd_neuron_xl/")
image = base(prompt=prompt, output_type="latent").images[0]
del base  # To avoid neuron device OOM

refiner = NeuronStableDiffusionXLImg2ImgPipeline.from_pretrained("sd_neuron_xl_refiner/")
image = refiner(prompt=prompt, image=image[None, :]).images[0]
基础图像 | 优化后的图像 |
|---|---|
 |  |
为避免 Neuron 设备内存不足,建议在运行优化模型之前完成所有基础推理并释放设备内存。
潜在一致性模型
潜在一致性模型 (LCM) 在 潜在一致性模型:通过 Simian Luo、Yiqin Tan、Longbo Huang、Jian Li 和 Hang Zhao 的少步推理合成高分辨率图像 中提出。 LCM 使在任何预训练的 LDM(包括 Stable Diffusion 和 SDXL)上进行更少步骤的推理成为可能。
在 optimum-neuron 中,您可以
- 使用
NeuronLatentConsistencyModelPipeline类来编译和运行从 Stable Diffusion (SD) 模型中提取的 LCM 的推理。 - 并继续使用
NeuronStableDiffusionXLPipeline类用于从 SDXL 模型中提取的 LCM。
以下是编译 Stable Diffusion ( SimianLuo/LCM_Dreamshaper_v7 ) 和 Stable Diffusion XL( latent-consistency/lcm-sdxl ) 的 LCM,然后在 AWS Inferentia 2 上运行推理的示例
编译 LCM
Stable Diffusion 的 LCM
from optimum.neuron import NeuronLatentConsistencyModelPipeline

model_id = "SimianLuo/LCM_Dreamshaper_v7"
num_images_per_prompt = 1
input_shapes = {"batch_size": 1, "height": 768, "width": 768, "num_images_per_prompt": num_images_per_prompt}
compiler_args = {"auto_cast": "matmul", "auto_cast_type": "bf16"}

stable_diffusion = NeuronLatentConsistencyModelPipeline.from_pretrained(
    model_id, export=True, **compiler_args, **input_shapes
)
save_directory = "lcm_sd_neuron/"
stable_diffusion.save_pretrained(save_directory)

# Push to hub
stable_diffusion.push_to_hub(save_directory, repository_id="my-neuron-repo", use_auth_token=True)  # Replace with your repo id, eg. "Jingya/LCM_Dreamshaper_v7_neuronx"
Stable Diffusion XL 的 LCM
from optimum.neuron import NeuronStableDiffusionXLPipeline

model_id = "stabilityai/stable-diffusion-xl-base-1.0"
unet_id = "latent-consistency/lcm-sdxl"
num_images_per_prompt = 1
input_shapes = {"batch_size": 1, "height": 1024, "width": 1024, "num_images_per_prompt": num_images_per_prompt}
compiler_args = {"auto_cast": "matmul", "auto_cast_type": "bf16"}

stable_diffusion = NeuronStableDiffusionXLPipeline.from_pretrained(
    model_id, unet_id=unet_id, export=True, **compiler_args, **input_shapes
)
save_directory = "lcm_sdxl_neuron/"
stable_diffusion.save_pretrained(save_directory)

# Push to hub
stable_diffusion.push_to_hub(save_directory, repository_id="my-neuron-repo", use_auth_token=True)   # Replace with your repo id, eg. "Jingya/lcm-sdxl-neuronx"
文本到图像
现在我们可以使用预编译模型,在 Inf2 上从文本提示生成图像
Stable Diffusion 的 LCM
from optimum.neuron import NeuronLatentConsistencyModelPipeline

pipe = NeuronLatentConsistencyModelPipeline.from_pretrained("Jingya/LCM_Dreamshaper_v7_neuronx")
prompts = ["Self-portrait oil painting, a beautiful cyborg with golden hair, 8k"] * 2

images = pipe(prompt=prompts, num_inference_steps=4, guidance_scale=8.0).images
Stable Diffusion XL 的 LCM
from optimum.neuron import NeuronStableDiffusionXLPipeline

pipe = NeuronStableDiffusionXLPipeline.from_pretrained("Jingya/lcm-sdxl-neuronx")
prompts = ["a close-up picture of an old man standing in the rain"] * 2

images = pipe(prompt=prompts, num_inference_steps=4, guidance_scale=8.0).images
Stable Diffusion XL Turbo
SDXL Turbo 是一种对抗性时间蒸馏 Stable Diffusion XL (SDXL) 模型,能够以少至 1 步运行推理(查看 🤗diffusers 以了解更多详情)。
在 optimum-neuron 中,您可以
- 使用
NeuronStableDiffusionXLPipeline类来编译和运行推理。
在这里,我们将使用 Optimum CLI 编译 stabilityai/sdxl-turbo 模型。
编译 SDXL Turbo
optimum-cli export neuron --model stabilityai/sdxl-turbo --batch_size 1 --height 512 --width 512 --auto_cast matmul --auto_cast_type bf16 sdxl_turbo_neuron/文本到图像
现在我们可以使用预编译模型,在 Inf2 上从文本提示生成图像
from optimum.neuron import NeuronStableDiffusionXLPipeline

pipe = NeuronStableDiffusionXLPipeline.from_pretrained("sdxl_turbo_neuron/", data_parallel_mode="all")
prompt = ["Self-portrait oil painting, a beautiful cyborg with golden hair, 8k"] * 2

images = pipe(prompt=prompt, guidance_scale=0.0, num_inference_steps=1).images
Inf2 实例包含一个或多个 Neuron 设备,每个 Neuron 设备包含 2 个 NeuronCore-v2。 默认情况下,我们将 LCM 的整个管道加载到两个 Neuron 核心。 这意味着当批次大小可被 2 整除时,您可以充分利用两个核心的计算能力。
加载适配器
LoRA
低秩自适应是 Stable Diffusion 快速适应生成图像风格的一种方法。 在 Optimum Neuron 中,我们支持通过在编译期间将其参数融合到文本编码器和 unet 的原始参数中来使用一个或多个 LoRA 适配器。 下面是一个使用您选择的 LoRA 适配器编译 stable diffusion 模型并使用编译后的工件生成风格化图像的示例
from diffusers import LCMScheduler
from optimum.neuron import NeuronStableDiffusionPipeline


model_id = "Lykon/dreamshaper-7"
adapter_id = "latent-consistency/lcm-lora-sdv1-5"
input_shapes = {"batch_size": 1, "height": 512, "width": 512, "num_images_per_prompt": 1}
compiler_args = {"auto_cast": "matmul", "auto_cast_type": "bf16"}

# Compile
pipe = NeuronStableDiffusionPipeline.from_pretrained(
    model_id,
    export=True,
    inline_weights_to_neff=True,  # caveat: performance drop if neff/weights separated, will be improved by a future Neuron sdk release.
    lora_model_ids=adapter_id,
    lora_weight_names="pytorch_lora_weights.safetensors",
    lora_adapter_names="lcm",
    **input_shapes,
    **compiler_args,
)
pipe.scheduler = LCMScheduler.from_config(pipe.scheduler.config)

# Save locally or upload to the HuggingFace Hub
pipe.save_pretrained("dreamshaper_7_lcm_lora_neuron/")


# Inference
prompt = "Self-portrait oil painting, a beautiful cyborg with golden hair, 8k"
image = pipe(prompt, num_inference_steps=4, guidance_scale=0).images[0]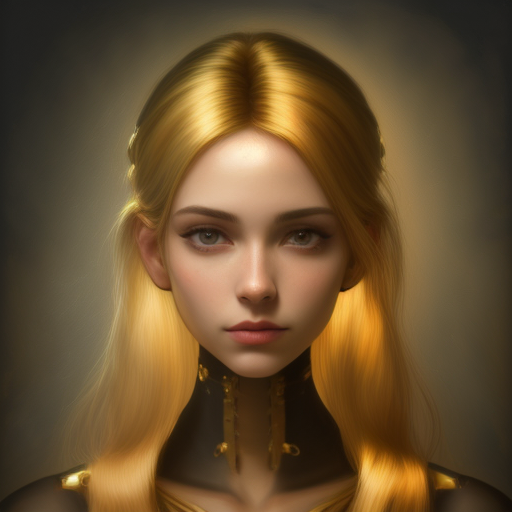
ControlNet
ControlNet 使用额外的输入图像来调节 stable diffusion 模型。 在 Optimum Neuron 中,我们支持编译一个或多个 ControlNet 以及 stable diffusion 检查点。 然后您可以使用编译后的工件来生成风格化图像。
编译 ControlNet
我们可以通过 Optimum CLI 编译一个或多个 ControlNet,也可以通过传递 controlnet_ids,使用 NeuronStableDiffusionControlNetPipeline 类以编程方式编译。
- 通过 Optimum CLI 导出
optimum-cli export neuron -m runwayml/stable-diffusion-v1-5 --batch_size 1 --height 512 --width 512 --controlnet_ids lllyasviel/sd-controlnet-canny --num_images_per_prompt 1 sd_neuron_controlnet/- 通过 Python API 导出
from optimum.neuron import NeuronStableDiffusionControlNetPipeline

model_id = "runwayml/stable-diffusion-v1-5"
controlnet_id = "lllyasviel/sd-controlnet-canny"

# [Neuron] pipeline
input_shapes = {"batch_size": 1, "height": 512, "width": 512, "num_images_per_prompt": 1}
compiler_args = {"auto_cast": "matmul", "auto_cast_type": "bf16"}
pipe = NeuronStableDiffusionControlNetPipeline.from_pretrained(
    model_id,
    controlnet_ids=controlnet_id,
    export=True,
    **input_shapes,
    **compiler_args,
)
pipe.save_pretrained("sd_neuron_controlnet")
文本到图像
对于文本到图像,我们可以指定额外的条件输入。
这是一个使用 canny 图像的示例,canny 图像是黑色背景上图像的白色轮廓。 ControlNet 将使用 canny 图像作为控制来指导模型生成具有相同轮廓的图像。
import cv2
import numpy as np
from diffusers import UniPCMultistepScheduler
from diffusers.utils import load_image, make_image_grid
from PIL import Image

from optimum.neuron import NeuronStableDiffusionControlNetPipeline


# prepare canny image
original_image = load_image(
    "https://huggingface.co/datasets/huggingface/documentation-images/resolve/main/diffusers/input_image_vermeer.png"
)

image = np.array(original_image)

low_threshold = 100
high_threshold = 200

image = cv2.Canny(image, low_threshold, high_threshold)
image = image[:, :, None]
image = np.concatenate([image, image, image], axis=2)
canny_image = Image.fromarray(image)

# load pre-compiled neuron model
pipe = NeuronStableDiffusionControlNetPipeline.from_pretrained("sd_neuron_controlnet")
pipe.scheduler = UniPCMultistepScheduler.from_config(pipe.scheduler.config)

# inference
output = pipe("the mona lisa", image=canny_image).images[0]
compare = make_image_grid([original_image, canny_image, output], rows=1, cols=3)
compare.save("compare.png")
MultiControlNet
使用 Optimum Neuron,您还可以组合来自不同图像输入的多个 ControlNet 条件
- 为 SD1.5 编译多个 ControlNet
optimum-cli export neuron --inline-weights-neff --model jyoung105/stable-diffusion-v1-5 --task stable-diffusion --auto_cast matmul --auto_cast_type bf16 --batch_size 1 --num_images_per_prompt 1 --controlnet_ids lllyasviel/control_v11p_sd15_openpose lllyasviel/control_v11f1p_sd15_depth --height 512 --width 512 sd15-512x512-bf16-openpose-depth- 使用 OpenPose 和 Depth 条件运行 SD1.5
import numpy as np
import torch
from PIL import Image

from controlnet_aux import OpenposeDetector
from transformers import pipeline
from diffusers import UniPCMultistepScheduler
from diffusers.utils import load_image
from optimum.neuron import NeuronStableDiffusionControlNetPipeline


# OpenPose+Depth ControlNet
model_id = "sd15-512x512-bf16-openpose-depth"

# Load ControlNet images

# 1. openpose
image = load_image("https://huggingface.co/lllyasviel/control_v11p_sd15_openpose/resolve/main/images/input.png")
processor = OpenposeDetector.from_pretrained('lllyasviel/ControlNet')
openpose_image = processor(image)

# 2. depth
image = load_image("https://huggingface.co/lllyasviel/control_v11p_sd15_depth/resolve/main/images/input.png")
depth_estimator = pipeline('depth-estimation')
image = depth_estimator(image)['depth']
image = np.array(image)
image = image[:, :, None]
image = np.concatenate([image, image, image], axis=2)
depth_image = Image.fromarray(image)

images = [openpose_image.resize((512, 512)), depth_image.resize((512, 512))]

# 3. inference
pipe = NeuronStableDiffusionControlNetPipeline.from_pretrained(model_id)
pipe.scheduler = UniPCMultistepScheduler.from_config(pipe.scheduler.config)
prompt = "a giant in a fantasy landscape, best quality"
negative_prompt = "monochrome, lowres, bad anatomy, worst quality, low quality"

image = pipe(prompt=prompt, image=images).images[0]
image.save('out.png')
ControlNet 与 Stable Diffusion XL
编译
optimum-cli export neuron -m stabilityai/stable-diffusion-xl-base-1.0 --task stable-diffusion-xl --batch_size 1 --height 1024 --width 1024 --controlnet_ids diffusers/controlnet-canny-sdxl-1.0-small --num_images_per_prompt 1 sdxl_neuron_controlnet/文本到图像
import cv2
import numpy as np
from diffusers.utils import load_image
from PIL import Image
from optimum.neuron import NeuronStableDiffusionXLControlNetPipeline

# Inputs
prompt = "aerial view, a futuristic research complex in a bright foggy jungle, hard lighting"
negative_prompt = "low quality, bad quality, sketches"

image = load_image(
    "https://huggingface.co/datasets/hf-internal-testing/diffusers-images/resolve/main/sd_controlnet/hf-logo.png"
)
image = np.array(image)
image = cv2.Canny(image, 100, 200)
image = image[:, :, None]
image = np.concatenate([image, image, image], axis=2)
image = Image.fromarray(image)

controlnet_conditioning_scale = 0.5  # recommended for good generalization

pipe = NeuronStableDiffusionXLControlNetPipeline.from_pretrained("sdxl_neuron_controlnet")

images = pipe(
    prompt,
    negative_prompt=negative_prompt,
    image=image,
    controlnet_conditioning_scale=controlnet_conditioning_scale,
).images
images[0].save("hug_lab.png")
PixArt-α
编译
optimum-cli export neuron --model PixArt-alpha/PixArt-XL-2-512x512 --batch_size 1 --height 512 --width 512 --num_images_per_prompt 1 --torch_dtype bfloat16 --sequence_length 120 pixart_alpha_neuron_512/文本到图像
from optimum.neuron import NeuronPixArtAlphaPipeline

neuron_model = NeuronPixArtAlphaPipeline.from_pretrained("pixart_alpha_neuron_512/")
prompt = "Oppenheimer sits on the beach on a chair, watching a nuclear exposition with a huge mushroom cloud, 120mm."
image = neuron_model(prompt=prompt).images[0]
您希望我们在 🤗Optimum-neuron 中支持其他 Stable Diffusion 功能吗?请在 Optimum-neuron Github 仓库中提交 issue,或在 HuggingFace 社区论坛上与我们讨论,谢谢 🤗!