深度强化学习课程文档
实战
并获得增强的文档体验
开始使用
实践
现在我们已经学习了 Q-学习算法,接下来我们将从头开始实现它,并在两个环境中训练我们的 Q-学习智能体
- Frozen-Lake-v1(非湿滑和湿滑版本) ☃️:我们的智能体需要**从起始状态(S)到达目标状态(G)**,只能在冰冻的方块(F)上行走,并避开洞(H)。
- 一辆自动出租车 🚖 需要**学习如何在城市中导航**,将**乘客从A点运送到B点。**

多亏了排行榜,你将能够与同学比较你的结果,并交流最佳实践来提高你智能体的分数。谁将赢得第二单元的挑战?
为了通过认证流程的实践部分,你需要将训练好的 Taxi 模型推送到 Hub,并且**获得 >= 4.5 的结果**。
要查看你的结果,请访问排行榜,找到你的模型,**结果 = 平均奖励 - 奖励标准差**
有关认证过程的更多信息,请查看此部分 👉 https://huggingface.co/deep-rl-course/en/unit0/introduction#certification-process
你可以在这里查看你的进度 👉 https://huggingface.co/spaces/ThomasSimonini/Check-my-progress-Deep-RL-Course
**要开始实践,请点击“在 Colab 中打开”按钮** 👇
![]()
我们强烈**建议学生使用 Google Colab 进行实践练习**,而不是在个人电脑上运行。
使用 Google Colab,**您可以专注于学习和实验,而无需担心环境设置的技术问题。**
单元2:Q-学习与FrozenLake-v1 ⛄ 和Taxi-v3 🚕

在本笔记中,**您将从头开始编写第一个强化学习代理**,以使用 Q-学习玩 FrozenLake ❄️,并将其分享给社区,并尝试不同的配置。
⬇️ 以下是**您在几分钟内就能实现**的示例。⬇️
🎮 环境:
📚 强化学习库:
- Python 和 NumPy
- Gymnasium
我们正在不断努力改进我们的教程,因此,**如果您在本笔记本中发现任何问题**,请在 GitHub 仓库上提出问题。
本笔记本的目标 🏆
在本笔记本结束时,您将:
- 能够使用**Gymnasium**,一个环境库。
- 能够从头开始编写一个 Q-学习代理。
- 能够将你训练好的智能体和代码上传到 Hub,并附带精彩的视频回放和评估分数 🔥。
本笔记节选自深度强化学习课程

在这门免费课程中,你将:
- 📖 **理论与实践**地学习深度强化学习。
- 🧑💻 学习**使用著名的深度强化学习库**,如 Stable Baselines3、RL Baselines3 Zoo、CleanRL 和 Sample Factory 2.0。
- 🤖 在**独特环境中训练智能体**
更多内容请查阅 📚 课程大纲 👉 https://simoninithomas.github.io/deep-rl-course
别忘了**报名课程**(我们正在收集您的电子邮件,以便**在每个单元发布时向您发送链接,并向您提供有关挑战和更新的信息**)。
保持联系的最佳方式是加入我们的 Discord 服务器,与社区和我们交流 👉🏻 https://discord.gg/ydHrjt3WP5
先决条件 🏗️
在深入学习本笔记本之前,您需要:
🔲 📚 **通过阅读第二单元来学习Q-学习** 🤗
Q-学习小结
Q-学习**是一种强化学习算法,它**
训练*Q 函数*,这是一种**动作价值函数**,它在内部存储中通过*Q 表*编码,**Q 表包含所有状态-动作对的值。**
给定一个状态和动作,我们的 Q 函数**将搜索 Q 表以找到相应的值。**

当训练完成后,**我们得到了一个最优的Q函数,也就是一个最优的Q表。**
如果**我们有一个最优的 Q 函数**,那么我们也就有了一个最优策略,因为我们**知道在每个状态下应该采取的最佳行动。**

然而,一开始,我们的**Q表是无用的,因为它为每个状态-动作对提供了任意值(大多数情况下,我们将Q表初始化为0值)**。但是,随着我们探索环境并更新Q表,它将为我们提供越来越好的近似。

这是Q-Learning的伪代码

让我们编写第一个强化学习算法 🚀
为了通过认证流程的实践部分,你需要将训练好的 Taxi 模型推送到 Hub,并且**获得 >= 4.5 的结果**。
要查看你的结果,请访问排行榜,找到你的模型,**结果 = 平均奖励 - 奖励标准差**
有关认证过程的更多信息,请查看此部分 👉 https://huggingface.co/deep-rl-course/en/unit0/introduction#certification-process
安装依赖项并创建虚拟显示器 🔽
在笔记本中,我们需要生成一个重放视频。为此,使用 Colab,**我们需要一个虚拟屏幕来渲染环境**(并因此记录帧)。
因此,以下单元格将安装库并创建并运行一个虚拟屏幕 🖥
我们将安装多个:
gymnasium:包含 FrozenLake-v1 ⛄ 和 Taxi-v3 🚕 环境。pygame:用于 FrozenLake-v1 和 Taxi-v3 UI。numpy:用于处理我们的 Q 表。
Hugging Face Hub 🤗 作为一个中心平台,任何人都可以共享和探索模型和数据集。它拥有版本控制、指标、可视化以及其他功能,让您能够轻松地与他人协作。
您可以在这里查看所有可用的深度强化学习模型(如果它们使用 Q 学习)👉 https://huggingface.co/models?other=q-learning
pip install -r https://raw.githubusercontent.com/huggingface/deep-rl-class/main/notebooks/unit2/requirements-unit2.txt
sudo apt-get update
sudo apt-get install -y python3-opengl
apt install ffmpeg xvfb
pip3 install pyvirtualdisplay
为确保新安装的库能被使用,**有时需要重新启动笔记本运行时**。下一个单元格将强制**运行时崩溃,因此您需要重新连接并从此处开始运行代码**。通过这个技巧,**我们将能够运行我们的虚拟屏幕。**
import os

os.kill(os.getpid(), 9)# Virtual display
from pyvirtualdisplay import Display
virtual_display = Display(visible=0, size=(1400, 900))
virtual_display.start()导入包 📦
除了已安装的库,我们还使用
random:生成随机数(对 epsilon-greedy 策略有用)。imageio:生成重放视频。
import numpy as np
import gymnasium as gym
import random
import imageio
import os
import tqdm

import pickle5 as pickle
from tqdm.notebook import tqdm
我们现在准备好编写我们的 Q-学习算法了 🔥
第一部分:冰冻湖 ⛄ (非湿滑版)
创建和理解 FrozenLake 环境 ⛄ ( https://gymnasium.org.cn/environments/toy_text/frozen_lake/ )
💡 开始使用环境时,一个好习惯是查看其文档
👉 https://gymnasium.org.cn/environments/toy_text/frozen_lake/
我们将训练我们的 Q-学习智能体**从起始状态(S)导航到目标状态(G),只在冰冻的瓷砖(F)上行走并避开洞(H)**。
我们可以有两种大小的环境
map_name="4x4":4x4 网格版本map_name="8x8":8x8 网格版本
该环境有两种模式
is_slippery=False:由于冰冻湖泊的非湿滑性(确定性),智能体总是**按预期方向**移动。is_slippery=True:由于冰冻湖的湿滑特性(随机性),智能体**可能不会总是按预期方向移动**。
现在我们先用4x4的非湿滑地图,简单点。我们添加一个名为render_mode的参数,用于指定环境的可视化方式。在本例中,因为我们**想在最后录制环境的视频,所以需要将render_mode设置为rgb_array**。
正如文档中所述,“rgb_array”:返回一个表示环境当前状态的单帧。一帧是一个形状为(x, y, 3)的np.ndarray,表示x乘y像素图像的RGB值。
# Create the FrozenLake-v1 environment using 4x4 map and non-slippery version and render_mode="rgb_array"
env = gym.make()  # TODO use the correct parameters
解决方案
env = gym.make("FrozenLake-v1", map_name="4x4", is_slippery=False, render_mode="rgb_array")您可以像这样创建自己的自定义网格
desc=["SFFF", "FHFH", "FFFH", "HFFG"]
gym.make('FrozenLake-v1', desc=desc, is_slippery=True)
但我们现在将使用默认环境。
让我们看看环境是怎样的:
# We create our environment with gym.make("<name_of_the_environment>")- `is_slippery=False`: The agent always moves in the intended direction due to the non-slippery nature of the frozen lake (deterministic).
print("_____OBSERVATION SPACE_____ \n")
print("Observation Space", env.observation_space)
print("Sample observation", env.observation_space.sample())  # Get a random observation
我们看到`Observation Space Shape Discrete(16)`表示观察是一个整数,代表**智能体的当前位置为 current_row * ncols + current_col(其中行和列都从0开始)**。
例如,4x4 地图中的目标位置可以计算为:3 * 4 + 3 = 15。可能的观察数量取决于地图的大小。**例如,4x4 地图有 16 种可能的观察。**
例如,状态 = 0 看起来像这样

print("\n _____ACTION SPACE_____ \n")
print("Action Space Shape", env.action_space.n)
print("Action Space Sample", env.action_space.sample())  # Take a random action
动作空间(智能体可以采取的可能动作集合)是离散的,有 4 个可用动作 🎮
- 0:向左走
- 1:向下走
- 2:向右走
- 3:向上走
奖励函数 💰
- 到达目标:+1
- 掉入洞中:0
- 到达冰面:0
创建并初始化 Q 表 🗄️
(👀 伪代码步骤 1)
是时候初始化我们的Q表了!为了知道要使用多少行(状态)和列(动作),我们需要知道动作空间和观察空间。我们之前已经知道了它们的值,但我们希望以编程方式获取它们,以便我们的算法能够适用于不同的环境。Gym 为我们提供了一种方法:`env.action_space.n` 和 `env.observation_space.n`
state_space =
print("There are ", state_space, " possible states")

action_space =
print("There are ", action_space, " possible actions")# Let's create our Qtable of size (state_space, action_space) and initialized each values at 0 using np.zeros. np.zeros needs a tuple (a,b)
def initialize_q_table(state_space, action_space):
Qtable =
return QtableQtable_frozenlake = initialize_q_table(state_space, action_space)
解决方案
state_space = env.observation_space.n
print("There are ", state_space, " possible states")

action_space = env.action_space.n
print("There are ", action_space, " possible actions")# Let's create our Qtable of size (state_space, action_space) and initialized each values at 0 using np.zeros
def initialize_q_table(state_space, action_space):
Qtable = np.zeros((state_space, action_space))
return QtableQtable_frozenlake = initialize_q_table(state_space, action_space)
定义贪婪策略 🤖
请记住,我们有两种策略,因为Q-学习是一种**离策略(off-policy)**算法。这意味着我们**使用不同的策略来执行动作和更新价值函数**。
- ε-贪婪策略(行动策略)
- 贪婪策略(更新策略)
贪婪策略也将是我们Q-学习智能体完成训练后的最终策略。贪婪策略用于使用Q表选择动作。

def greedy_policy(Qtable, state):
  # Exploitation: take the action with the highest state, action value
  action =

  return action
解决方案
def greedy_policy(Qtable, state):
    # Exploitation: take the action with the highest state, action value
    action = np.argmax(Qtable[state][:])

    return action
定义ε-贪婪策略 🤖
ε-贪婪是处理探索/利用权衡的训练策略。
ε-贪婪的想法是:
有*1-ɛ的概率*:**我们进行利用**(即我们的代理选择具有最高状态-动作对价值的动作)。
有*ε的概率*:我们进行**探索**(尝试一个随机动作)。
随着训练的进行,我们逐渐**减小epsilon值,因为我们将越来越少地需要探索,而更多地需要利用。**

def epsilon_greedy_policy(Qtable, state, epsilon):
  # Randomly generate a number between 0 and 1
  random_num =
  # if random_num > greater than epsilon --> exploitation
  if random_num > epsilon:
    # Take the action with the highest value given a state
    # np.argmax can be useful here
    action =
  # else --> exploration
  else:
    action = # Take a random action

  return action
解决方案
def epsilon_greedy_policy(Qtable, state, epsilon):
    # Randomly generate a number between 0 and 1
    random_num = random.uniform(0, 1)
    # if random_num > greater than epsilon --> exploitation
    if random_num > epsilon:
        # Take the action with the highest value given a state
        # np.argmax can be useful here
        action = greedy_policy(Qtable, state)
    # else --> exploration
    else:
        action = env.action_space.sample()

    return action
定义超参数 ⚙️
与探索相关的超参数是其中最重要的。
- 我们需要确保我们的智能体**充分探索了状态空间**以学习一个好的价值近似。为此,我们需要逐步衰减epsilon。
- 如果epsilon衰减过快(衰减率过高),**你的智能体就有可能陷入困境**,因为它没有充分探索状态空间,因此无法解决问题。
# Training parameters
n_training_episodes = 10000  # Total training episodes
learning_rate = 0.7  # Learning rate

# Evaluation parameters
n_eval_episodes = 100  # Total number of test episodes

# Environment parameters
env_id = "FrozenLake-v1"  # Name of the environment
max_steps = 99  # Max steps per episode
gamma = 0.95  # Discounting rate
eval_seed = []  # The evaluation seed of the environment

# Exploration parameters
max_epsilon = 1.0  # Exploration probability at start
min_epsilon = 0.05  # Minimum exploration probability
decay_rate = 0.0005  # Exponential decay rate for exploration prob
创建训练循环方法
训练循环是这样的
For episode in the total of training episodes:

Reduce epsilon (since we need less and less exploration)
Reset the environment

  For step in max timesteps:
    Choose the action At using epsilon greedy policy
    Take the action (a) and observe the outcome state(s') and reward (r)
    Update the Q-value Q(s,a) using Bellman equation Q(s,a) + lr [R(s,a) + gamma * max Q(s',a') - Q(s,a)]
    If done, finish the episode
Our next state is the new statedef train(n_training_episodes, min_epsilon, max_epsilon, decay_rate, env, max_steps, Qtable):
for episode in tqdm(range(n_training_episodes)):
# Reduce epsilon (because we need less and less exploration)
epsilon = min_epsilon + (max_epsilon - min_epsilon)*np.exp(-decay_rate*episode)
# Reset the environment
state, info = env.reset()
step = 0
terminated = False
truncated = False
# repeat
for step in range(max_steps):
# Choose the action At using epsilon greedy policy
action =
# Take action At and observe Rt+1 and St+1
# Take the action (a) and observe the outcome state(s') and reward (r)
new_state, reward, terminated, truncated, info =
# Update Q(s,a):= Q(s,a) + lr [R(s,a) + gamma * max Q(s',a') - Q(s,a)]
Qtable[state][action] =
# If terminated or truncated finish the episode
if terminated or truncated:
break
# Our next state is the new state
state = new_state
return Qtable解决方案
def train(n_training_episodes, min_epsilon, max_epsilon, decay_rate, env, max_steps, Qtable):
    for episode in tqdm(range(n_training_episodes)):
        # Reduce epsilon (because we need less and less exploration)
        epsilon = min_epsilon + (max_epsilon - min_epsilon) * np.exp(-decay_rate * episode)
        # Reset the environment
        state, info = env.reset()
        step = 0
        terminated = False
        truncated = False

        # repeat
        for step in range(max_steps):
            # Choose the action At using epsilon greedy policy
            action = epsilon_greedy_policy(Qtable, state, epsilon)

            # Take action At and observe Rt+1 and St+1
            # Take the action (a) and observe the outcome state(s') and reward (r)
            new_state, reward, terminated, truncated, info = env.step(action)

            # Update Q(s,a):= Q(s,a) + lr [R(s,a) + gamma * max Q(s',a') - Q(s,a)]
            Qtable[state][action] = Qtable[state][action] + learning_rate * (
                reward + gamma * np.max(Qtable[new_state]) - Qtable[state][action]
            )

            # If terminated or truncated finish the episode
            if terminated or truncated:
                break

            # Our next state is the new state
            state = new_state
    return Qtable
训练Q-学习智能体 🏃
Qtable_frozenlake = train(n_training_episodes, min_epsilon, max_epsilon, decay_rate, env, max_steps, Qtable_frozenlake)
现在来看看我们的Q-学习表长什么样 👀
Qtable_frozenlake
评估方法 📝
- 我们定义了将用于测试Q-学习智能体的评估方法。
def evaluate_agent(env, max_steps, n_eval_episodes, Q, seed):
    """
    Evaluate the agent for ``n_eval_episodes`` episodes and returns average reward and std of reward.
    :param env: The evaluation environment
    :param n_eval_episodes: Number of episode to evaluate the agent
    :param Q: The Q-table
    :param seed: The evaluation seed array (for taxi-v3)
    """
    episode_rewards = []
    for episode in tqdm(range(n_eval_episodes)):
        if seed:
            state, info = env.reset(seed=seed[episode])
        else:
            state, info = env.reset()
        step = 0
        truncated = False
        terminated = False
        total_rewards_ep = 0

        for step in range(max_steps):
            # Take the action (index) that have the maximum expected future reward given that state
            action = greedy_policy(Q, state)
            new_state, reward, terminated, truncated, info = env.step(action)
            total_rewards_ep += reward

            if terminated or truncated:
                break
            state = new_state
        episode_rewards.append(total_rewards_ep)
    mean_reward = np.mean(episode_rewards)
    std_reward = np.std(episode_rewards)

    return mean_reward, std_reward
评估我们的 Q-学习智能体 📈
- 通常,您应该获得 1.0 的平均奖励
- 这个**环境相对简单**,因为状态空间非常小(16个)。你可以尝试**替换为湿滑版本**,这会引入随机性,使环境更复杂。
# Evaluate our Agent
mean_reward, std_reward = evaluate_agent(env, max_steps, n_eval_episodes, Qtable_frozenlake, eval_seed)
print(f"Mean_reward={mean_reward:.2f} +/- {std_reward:.2f}")
将我们训练好的模型发布到 Hub 🔥
现在我们已经看到训练后的良好结果,**我们可以用一行代码将我们训练好的模型发布到 Hub 🤗**。
这是一个模型卡的例子

在底层,Hub 使用基于 Git 的仓库(如果你不了解 Git,别担心),这意味着你可以在实验并改进智能体时使用新版本更新模型。
请勿修改此代码
from huggingface_hub import HfApi, snapshot_download
from huggingface_hub.repocard import metadata_eval_result, metadata_save

from pathlib import Path
import datetime
import jsondef record_video(env, Qtable, out_directory, fps=1):
"""
Generate a replay video of the agent
:param env
:param Qtable: Qtable of our agent
:param out_directory
:param fps: how many frame per seconds (with taxi-v3 and frozenlake-v1 we use 1)
"""
images = []
terminated = False
truncated = False
state, info = env.reset(seed=random.randint(0, 500))
img = env.render()
images.append(img)
while not terminated or truncated:
# Take the action (index) that have the maximum expected future reward given that state
action = np.argmax(Qtable[state][:])
state, reward, terminated, truncated, info = env.step(
action
) # We directly put next_state = state for recording logic
img = env.render()
images.append(img)
imageio.mimsave(out_directory, [np.array(img) for i, img in enumerate(images)], fps=fps)def push_to_hub(repo_id, model, env, video_fps=1, local_repo_path="hub"):
"""
Evaluate, Generate a video and Upload a model to Hugging Face Hub.
This method does the complete pipeline:
- It evaluates the model
- It generates the model card
- It generates a replay video of the agent
- It pushes everything to the Hub
:param repo_id: repo_id: id of the model repository from the Hugging Face Hub
:param env
:param video_fps: how many frame per seconds to record our video replay
(with taxi-v3 and frozenlake-v1 we use 1)
:param local_repo_path: where the local repository is
"""
_, repo_name = repo_id.split("/")
eval_env = env
api = HfApi()
# Step 1: Create the repo
repo_url = api.create_repo(
repo_id=repo_id,
exist_ok=True,
)
# Step 2: Download files
repo_local_path = Path(snapshot_download(repo_id=repo_id))
# Step 3: Save the model
if env.spec.kwargs.get("map_name"):
model["map_name"] = env.spec.kwargs.get("map_name")
if env.spec.kwargs.get("is_slippery", "") == False:
model["slippery"] = False
# Pickle the model
with open((repo_local_path) / "q-learning.pkl", "wb") as f:
pickle.dump(model, f)
# Step 4: Evaluate the model and build JSON with evaluation metrics
mean_reward, std_reward = evaluate_agent(
eval_env, model["max_steps"], model["n_eval_episodes"], model["qtable"], model["eval_seed"]
)
evaluate_data = {
"env_id": model["env_id"],
"mean_reward": mean_reward,
"n_eval_episodes": model["n_eval_episodes"],
"eval_datetime": datetime.datetime.now().isoformat(),
}
# Write a JSON file called "results.json" that will contain the
# evaluation results
with open(repo_local_path / "results.json", "w") as outfile:
json.dump(evaluate_data, outfile)
# Step 5: Create the model card
env_name = model["env_id"]
if env.spec.kwargs.get("map_name"):
env_name += "-" + env.spec.kwargs.get("map_name")
if env.spec.kwargs.get("is_slippery", "") == False:
env_name += "-" + "no_slippery"
metadata = {}
metadata["tags"] = [env_name, "q-learning", "reinforcement-learning", "custom-implementation"]
# Add metrics
eval = metadata_eval_result(
model_pretty_name=repo_name,
task_pretty_name="reinforcement-learning",
task_id="reinforcement-learning",
metrics_pretty_name="mean_reward",
metrics_id="mean_reward",
metrics_value=f"{mean_reward:.2f} +/- {std_reward:.2f}",
dataset_pretty_name=env_name,
dataset_id=env_name,
)
# Merges both dictionaries
metadata = {**metadata, **eval}
model_card = f"""
# **Q-Learning** Agent playing1 **{env_id}**
This is a trained model of a **Q-Learning** agent playing **{env_id}** .
## Usage
model = load_from_hub(repo_id="{repo_id}", filename="q-learning.pkl")
# Don't forget to check if you need to add additional attributes (is_slippery=False etc)
env = gym.make(model["env_id"])
"""
evaluate_agent(env, model["max_steps"], model["n_eval_episodes"], model["qtable"], model["eval_seed"])
readme_path = repo_local_path / "README.md"
readme = ""
print(readme_path.exists())
if readme_path.exists():
with readme_path.open("r", encoding="utf8") as f:
readme = f.read()
else:
readme = model_card
with readme_path.open("w", encoding="utf-8") as f:
f.write(readme)
# Save our metrics to Readme metadata
metadata_save(readme_path, metadata)
# Step 6: Record a video
video_path = repo_local_path / "replay.mp4"
record_video(env, model["qtable"], video_path, video_fps)
# Step 7. Push everything to the Hub
api.upload_folder(
repo_id=repo_id,
folder_path=repo_local_path,
path_in_repo=".",
)
print("Your model is pushed to the Hub. You can view your model here: ", repo_url).
通过使用push_to_hub,您**可以评估、录制回放、生成代理的模型卡并将其推送到Hub**。
通过这种方式
- 你可以展示我们的工作 🔥
- 你可以可视化你的智能体在玩游戏 👀
- 您可以**与社区共享一个代理,其他人可以使用** 💾
- 您可以**访问排行榜 🏆,查看您的智能体与同学相比的表现** 👉 https://huggingface.co/spaces/huggingface-projects/Deep-Reinforcement-Learning-Leaderboard
为了能够与社区分享你的模型,还需要完成三个步骤
1️⃣ (如果尚未完成)创建 HF 帐户 ➡ https://huggingface.co/join
2️⃣ 登录后,你需要从 Hugging Face 网站存储你的身份验证令牌。
- 创建一个新令牌(https://huggingface.co/settings/tokens),并赋予写入权限

from huggingface_hub import notebook_login

notebook_login()
如果您不想使用 Google Colab 或 Jupyter Notebook,则需要使用以下命令:`huggingface-cli login`(或`login`)
3️⃣ 我们现在准备好使用 `push_to_hub()` 函数将我们训练好的代理推送到 🤗 Hub 🔥
- 我们来创建**包含超参数和 Q_table 的模型字典**。
model = {
    "env_id": env_id,
    "max_steps": max_steps,
    "n_training_episodes": n_training_episodes,
    "n_eval_episodes": n_eval_episodes,
    "eval_seed": eval_seed,
    "learning_rate": learning_rate,
    "gamma": gamma,
    "max_epsilon": max_epsilon,
    "min_epsilon": min_epsilon,
    "decay_rate": decay_rate,
    "qtable": Qtable_frozenlake,
}
让我们填写 `push_to_hub` 函数
repo_id:将要创建/更新的 Hugging Face Hub 存储库的名称 `(repo_id = {username}/{repo_name})` 💡 一个好的 `repo_id` 是 `{username}/q-{env_id}`model:包含超参数和Q表的模型字典。env:环境。commit_message:提交消息
model
username = ""  # FILL THIS
repo_name = "q-FrozenLake-v1-4x4-noSlippery"
push_to_hub(repo_id=f"{username}/{repo_name}", model=model, env=env)
恭喜 🥳 您刚刚从头开始实现、训练并上传了您的第一个强化学习代理。FrozenLake-v1 non_slippery 是一个非常简单的环境,让我们尝试一个更难的 🔥。
第二部分:出租车-v3 🚖
创建和理解 Taxi-v3 🚕
💡 开始使用环境时,一个好习惯是查看其文档
👉 https://gymnasium.org.cn/environments/toy_text/taxi/
在 `Taxi-v3` 🚕 中,网格世界中有四个指定位置,用 R(红色)、G(绿色)、Y(黄色)和 B(蓝色)表示。
当剧集开始时,**出租车从一个随机方格开始**,乘客也在一个随机位置。出租车开到乘客所在位置,**接上乘客**,开到乘客目的地(四个指定位置中的另一个),然后**放下乘客**。乘客下车后,剧集结束。

env = gym.make("Taxi-v3", render_mode="rgb_array")由于有25个出租车位置、5个乘客可能位置(包括乘客在出租车内的情况)和4个目的地位置,因此有**500个离散状态。**
state_space = env.observation_space.n
print("There are ", state_space, " possible states")action_space = env.action_space.n
print("There are ", action_space, " possible actions")动作空间(代理可以采取的可能动作集合)是离散的,有**6个可用动作 🎮**
- 0:向南移动
- 1:向北移动
- 2:向东移动
- 3:向西移动
- 4:接载乘客
- 5:放下乘客
奖励函数 💰
- 每步 -1,除非触发其他奖励。
- 交付乘客 +20。
- 非法执行“接载”和“下车”操作 -10。
# Create our Q table with state_size rows and action_size columns (500x6)
Qtable_taxi = initialize_q_table(state_space, action_space)
print(Qtable_taxi)
print("Q-table shape: ", Qtable_taxi.shape)
定义超参数 ⚙️
⚠ 不要修改 EVAL_SEED:eval_seed 数组**允许我们用相同的出租车起始位置评估你的智能体,以确保每个同学的评估一致**
# Training parameters
n_training_episodes = 25000  # Total training episodes
learning_rate = 0.7  # Learning rate

# Evaluation parameters
n_eval_episodes = 100  # Total number of test episodes

# DO NOT MODIFY EVAL_SEED
eval_seed = [
    16,
    54,
    165,
    177,
    191,
    191,
    120,
    80,
    149,
    178,
    48,
    38,
    6,
    125,
    174,
    73,
    50,
    172,
    100,
    148,
    146,
    6,
    25,
    40,
    68,
    148,
    49,
    167,
    9,
    97,
    164,
    176,
    61,
    7,
    54,
    55,
    161,
    131,
    184,
    51,
    170,
    12,
    120,
    113,
    95,
    126,
    51,
    98,
    36,
    135,
    54,
    82,
    45,
    95,
    89,
    59,
    95,
    124,
    9,
    113,
    58,
    85,
    51,
    134,
    121,
    169,
    105,
    21,
    30,
    11,
    50,
    65,
    12,
    43,
    82,
    145,
    152,
    97,
    106,
    55,
    31,
    85,
    38,
    112,
    102,
    168,
    123,
    97,
    21,
    83,
    158,
    26,
    80,
    63,
    5,
    81,
    32,
    11,
    28,
    148,
]  # Evaluation seed, this ensures that all classmates agents are trained on the same taxi starting position
# Each seed has a specific starting state

# Environment parameters
env_id = "Taxi-v3"  # Name of the environment
max_steps = 99  # Max steps per episode
gamma = 0.95  # Discounting rate

# Exploration parameters
max_epsilon = 1.0  # Exploration probability at start
min_epsilon = 0.05  # Minimum exploration probability
decay_rate = 0.005  # Exponential decay rate for exploration prob
训练我们的Q-学习智能体 🏃
Qtable_taxi = train(n_training_episodes, min_epsilon, max_epsilon, decay_rate, env, max_steps, Qtable_taxi)
Qtable_taxi
创建模型字典 💾 并将我们训练好的模型发布到 Hub 🔥
- 我们创建了一个模型字典,其中将包含所有训练超参数以实现可复现性以及 Q-表。
model = {
    "env_id": env_id,
    "max_steps": max_steps,
    "n_training_episodes": n_training_episodes,
    "n_eval_episodes": n_eval_episodes,
    "eval_seed": eval_seed,
    "learning_rate": learning_rate,
    "gamma": gamma,
    "max_epsilon": max_epsilon,
    "min_epsilon": min_epsilon,
    "decay_rate": decay_rate,
    "qtable": Qtable_taxi,
}username = "" # FILL THIS
repo_name = "" # FILL THIS
push_to_hub(repo_id=f"{username}/{repo_name}", model=model, env=env)现在它已经在 Hub 上了,您可以使用排行榜 🏆 将您的 Taxi-v3 结果与您的同学进行比较 👉 https://huggingface.co/spaces/huggingface-projects/Deep-Reinforcement-Learning-Leaderboard

第三部分:从 Hub 加载 🔽
Hugging Face Hub 🤗 的惊人之处在于,您可以轻松加载社区中的强大模型。
从 Hub 加载保存的模型非常简单
- 您可以访问https://huggingface.co/models?other=q-learning查看所有Q-学习保存的模型列表。
- 您选择一个并复制其repo_id

- 然后我们只需要使用 `load_from_hub`,参数为:
- repo_id
- 文件名:仓库中保存的模型。
请勿修改此代码
from urllib.error import HTTPError

from huggingface_hub import hf_hub_download


def load_from_hub(repo_id: str, filename: str) -> str:
    """
    Download a model from Hugging Face Hub.
    :param repo_id: id of the model repository from the Hugging Face Hub
    :param filename: name of the model zip file from the repository
    """
    # Get the model from the Hub, download and cache the model on your local disk
    pickle_model = hf_hub_download(repo_id=repo_id, filename=filename)

    with open(pickle_model, "rb") as f:
        downloaded_model_file = pickle.load(f)

    return downloaded_model_file
.
model = load_from_hub(repo_id="ThomasSimonini/q-Taxi-v3", filename="q-learning.pkl")  # Try to use another model

print(model)
env = gym.make(model["env_id"])

evaluate_agent(env, model["max_steps"], model["n_eval_episodes"], model["qtable"], model["eval_seed"])model = load_from_hub(
repo_id="ThomasSimonini/q-FrozenLake-v1-no-slippery", filename="q-learning.pkl"
) # Try to use another model
env = gym.make(model["env_id"], is_slippery=False)
evaluate_agent(env, model["max_steps"], model["n_eval_episodes"], model["qtable"], model["eval_seed"])一些额外的挑战 🏆
学习的最好方法**是自己尝试**!正如你所看到的,当前的智能体表现不佳。首先,你可以尝试训练更多步。经过 1,000,000 步的训练,我们看到了一些很棒的结果!
在排行榜中你会找到你的智能体。你能名列前茅吗?
以下是提高排名的几个想法
- 训练更多步
- 通过查看同学的做法来尝试不同的超参数。
- **将您新训练的模型推送到 Hub** 🔥
在冰上行走和驾驶出租车对你来说太无聊了吗?尝试**改变环境**,为什么不使用 FrozenLake-v1 湿滑版本呢?使用 gymnasium 文档查看它们如何工作,然后尽情享受吧 🎉。
恭喜 🥳,您刚刚实现了、训练了并上传了您的第一个强化学习智能体。
理解 Q-学习是**理解基于价值的方法的重要一步。**
在下一个深度Q-学习单元中,我们将看到,虽然创建和更新Q表是一种不错的策略,但**它不可扩展。**
例如,想象您创建了一个学习玩《毁灭战士》的代理。
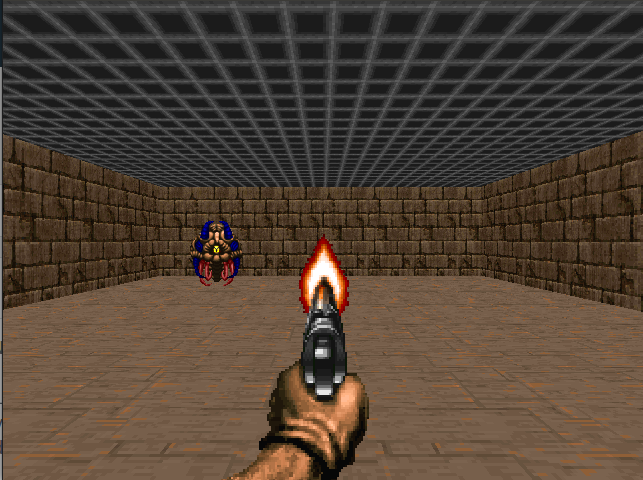
Doom 是一个拥有巨大状态空间(数百万种不同状态)的大型环境。为该环境创建和更新 Q 表将效率低下。
这就是为什么我们将在下一个单元中学习深度 Q-学习,这是一种算法,**我们使用神经网络来近似给定状态下每个动作的不同 Q 值。**

第三单元见!🔥