深度强化学习课程文档
实战
并获得增强的文档体验
开始使用
实践
我们已经学习了 ML-Agents 是什么以及它是如何工作的。我们还研究了我们将要使用的两个环境。现在我们已经准备好训练我们的代理了!

要验证此实践以进行认证,您只需将训练好的模型推送到 Hub。没有最低结果要求即可验证此实践。但如果您想获得不错的结果,可以尝试达到以下目标:
- 对于 Pyramids:平均奖励 = 1.75
- 对于 SnowballTarget:平均奖励 = 15 或 30 个目标在一次训练中被击中。
有关认证流程的更多信息,请查看此部分 👉 https://huggingface.co/deep-rl-course/en/unit0/introduction#certification-process
要开始实践,请点击“在 Colab 中打开”按钮 👇
![]()
我们强烈**建议学生使用 Google Colab 进行实践练习**,而不是在个人电脑上运行。
使用 Google Colab,**您可以专注于学习和实验,而无需担心环境设置的技术问题。**
单元 5:ML-Agents 简介

在本笔记本中,您将了解 ML-Agents 并训练两个代理。
- 第一个将学习向生成的目标发射雪球。
- 第二个需要按下按钮生成一个金字塔,然后导航到金字塔,将其推倒,并移动到顶部的金砖。为此,它需要探索其环境,我们将使用一种称为好奇心的技术。
之后,您将能够直接在浏览器中观看您的代理玩游戏。
有关认证流程的更多信息,请查看此部分 👉 https://huggingface.co/deep-rl-course/en/unit0/introduction#certification-process
⬇️ 以下是您在本单元结束时将实现的一个示例。⬇️


🎮 环境:
- 金字塔
- 雪球目标
📚 RL-库:
我们正在不断努力改进我们的教程,因此,**如果您在本笔记本中发现任何问题**,请在 GitHub 仓库上提出问题。
本笔记本的目标 🏆
在本笔记本结束时,您将:
- 了解 ML-Agents 如何工作以及环境库。
- 能够在 Unity 环境中训练代理。
先决条件 🏗️
在深入学习本笔记本之前,您需要:
🔲 📚 阅读单元 5 了解 ML-Agents 是什么以及它是如何工作的 🤗
让我们训练我们的代理 🚀
设置 GPU 💪
- 为了加速智能体的训练,我们将使用 GPU。为此,请转到
Runtime > Change Runtime type

硬件加速器 > GPU

克隆仓库 🔽
- 我们需要克隆包含 ML-Agents 的仓库。
# Clone the repository (can take 3min)
git clone --depth 1 https://github.com/Unity-Technologies/ml-agents
设置虚拟环境 🔽
为了使 ML-Agents 在 Colab 中成功运行,Colab 的 Python 版本必须满足库的 Python 要求。
我们可以检查 `setup.py` 文件中的 `python_requires` 参数以了解支持的 Python 版本。这些文件是设置 ML-Agents 库以供使用所必需的,可以在以下位置找到:
/content/ml-agents/ml-agents/setup.py/content/ml-agents/ml-agents-envs/setup.py
Colab 当前的 Python 版本(可以通过 `!python --version` 检查)与库的 `python_requires` 参数不匹配,因此安装可能会静默失败并导致后续执行相同命令时出现以下错误:
/bin/bash: 第 1 行: mlagents-learn: 找不到命令/bin/bash: 第 1 行: mlagents-push-to-hf: 找不到命令
为了解决这个问题,我们将创建一个与 ML-Agents 库兼容的 Python 版本的虚拟环境。
注意: 为了将来的兼容性,请务必检查安装文件中的 `python_requires` 参数,如果 Colab 的 Python 版本不兼容,请将您的虚拟环境设置为下面脚本中支持的最大 Python 版本。
# Colab's Current Python Version (Incompatible with ML-Agents)
!python --version# Install virtualenv and create a virtual environment
!pip install virtualenv
!virtualenv myenv
# Download and install Miniconda
!wget https://repo.anaconda.com/miniconda/Miniconda3-latest-Linux-x86_64.sh
!chmod +x Miniconda3-latest-Linux-x86_64.sh
!./Miniconda3-latest-Linux-x86_64.sh -b -f -p /usr/local
# Activate Miniconda and install Python ver 3.10.12
!source /usr/local/bin/activate
!conda install -q -y --prefix /usr/local python=3.10.12 ujson # Specify the version here
# Set environment variables for Python and conda paths
!export PYTHONPATH=/usr/local/lib/python3.10/site-packages/
!export CONDA_PREFIX=/usr/local/envs/myenv# Python Version in New Virtual Environment (Compatible with ML-Agents)
!python --version安装依赖 🔽
# Go inside the repository and install the package (can take 3min)
%cd ml-agents
pip3 install -e ./ml-agents-envs
pip3 install -e ./ml-agents
SnowballTarget ⛄
如果您需要回顾此环境的工作原理,请查看此部分 👉 https://huggingface.co/deep-rl-course/unit5/snowball-target
下载环境 zip 文件并将其移动到 ./training-envs-executables/linux/
- 我们的环境可执行文件是一个 zip 文件。
- 我们需要下载并将其放置到
./training-envs-executables/linux/ - 我们使用 Linux 可执行文件,因为我们使用 Colab,而 Colab 机器的操作系统是 Ubuntu (Linux)
# Here, we create training-envs-executables and linux
mkdir ./training-envs-executables
mkdir ./training-envs-executables/linux
我们使用 wget 从 https://github.com/huggingface/Snowball-Target 下载了 SnowballTarget.zip 文件
wget "https://github.com/huggingface/Snowball-Target/raw/main/SnowballTarget.zip" -O ./training-envs-executables/linux/SnowballTarget.zip我们解压可执行的 zip 文件。
unzip -d ./training-envs-executables/linux/ ./training-envs-executables/linux/SnowballTarget.zip
确保您的文件可访问
chmod -R 755 ./training-envs-executables/linux/SnowballTarget定义 SnowballTarget 配置文件
- 在 ML-Agents 中,您在 config.yaml 文件中定义训练超参数。
有多个超参数。要更好地理解它们,您应该阅读 文档中每个超参数的解释
您需要在 ./content/ml-agents/config/ppo/ 中创建一个 `SnowballTarget.yaml` 配置文件
我们将为您提供此配置的初步版本(复制并粘贴到您的 SnowballTarget.yaml 文件中),但您应该对其进行修改。
behaviors:
  SnowballTarget:
    trainer_type: ppo
    summary_freq: 10000
    keep_checkpoints: 10
    checkpoint_interval: 50000
    max_steps: 200000
    time_horizon: 64
    threaded: true
    hyperparameters:
      learning_rate: 0.0003
      learning_rate_schedule: linear
      batch_size: 128
      buffer_size: 2048
      beta: 0.005
      epsilon: 0.2
      lambd: 0.95
      num_epoch: 3
    network_settings:
      normalize: false
      hidden_units: 256
      num_layers: 2
      vis_encode_type: simple
    reward_signals:
      extrinsic:
        gamma: 0.99
        strength: 1.0

作为一项实验,尝试修改一些其他超参数。Unity 在此处提供了非常好的文档,解释了每个超参数。
现在您已经创建了配置文件并了解了大多数超参数的作用,我们准备好训练我们的代理了 🔥。
训练代理
为了训练我们的代理,我们需要启动 mlagents-learn 并选择包含环境的可执行文件。
我们定义四个参数
mlagents-learn <config>:超参数配置文件的路径。--env:环境可执行文件的位置。--run_id:您希望为训练运行 ID 指定的名称。--no-graphics:训练期间不启动可视化。

训练模型并使用 --resume 标志以在中断时继续训练。
如果您第一次使用
--resume,它会失败。尝试重新运行该块以绕过错误。
训练将需要 10 到 35 分钟,具体取决于您的配置。去喝杯 ☕️,您值得拥有 🤗。
mlagents-learn ./config/ppo/SnowballTarget.yaml --env=./training-envs-executables/linux/SnowballTarget/SnowballTarget --run-id="SnowballTarget1" --no-graphics将代理推送到 Hugging Face Hub
- 现在我们已经训练好了代理,我们准备好将其推送到 Hub 并在浏览器中可视化它玩游戏 🔥。
为了能够与社区分享您的模型,还需要遵循三个步骤
1️⃣ (如果尚未完成)创建 HF 帐户 ➡ https://huggingface.co/join
2️⃣ 从 Hugging Face 网站登录并存储您的身份验证令牌。
- 创建一个新令牌(https://huggingface.co/settings/tokens),并赋予写入权限

- 复制令牌
- 运行下方单元格并粘贴令牌
from huggingface_hub import notebook_login

notebook_login()
如果您不想使用 Google Colab 或 Jupyter Notebook,则需要使用此命令代替:huggingface-cli login
然后我们需要运行 mlagents-push-to-hf。
我们定义四个参数
--run-id:训练运行 ID 的名称。--local-dir:代理保存的位置,即 results/<run_id name>,在我的例子中是 results/First Training。--repo-id:您要创建或更新的 Hugging Face 仓库的名称。它总是 <您的 huggingface 用户名>/<仓库名称>。如果仓库不存在,它将自动创建。--commit-message:由于 HF 仓库是 git 仓库,您需要提供一个提交消息。

例如
mlagents-push-to-hf --run-id="SnowballTarget1" --local-dir="./results/SnowballTarget1" --repo-id="ThomasSimonini/ppo-SnowballTarget" --commit-message="First Push"
mlagents-push-to-hf --run-id= # Add your run id --local-dir= # Your local dir --repo-id= # Your repo id --commit-message= # Your commit message如果一切顺利,您应该在过程结束时看到此内容(但 URL 会不同 😆)
Your model is pushed to the hub. You can view your model here: https://huggingface.co/ThomasSimonini/ppo-SnowballTarget这是您模型的链接。它包含一个模型卡,解释了如何使用它、您的 Tensorboard 和您的配置文件。最棒的是,它是一个 git 仓库,这意味着您可以有不同的提交,通过新的推送更新您的仓库等。
但现在最棒的来了:能够在线可视化您的代理玩游戏 👀。
观看您的代理玩游戏 👀
这一步很简单
前往此处:https://huggingface.co/spaces/ThomasSimonini/ML-Agents-SnowballTarget
启动游戏并通过单击右下角的按钮将其全屏显示

在步骤 1 中,输入您的用户名(您的用户名区分大小写:例如,我的用户名是 ThomasSimonini 而不是 thomassimonini 或 ThOmasImoNInI),然后单击搜索按钮。
在步骤 2 中,选择您的模型仓库。
在步骤 3 中,选择您想要回放的模型
- 我有很多模型,因为我们每 500000 步保存一个模型。
- 但我想要最新的,所以我选择
SnowballTarget.onnx
👉 最好尝试使用不同的模型步骤,以查看代理的改进。
别犹豫在 Discord 的 #rl-i-made-this 频道分享您的代理获得的最高分数 🔥
现在让我们尝试一个更具挑战性的环境,叫做 Pyramids。
金字塔 🏆
下载环境 zip 文件并将其移动到 ./training-envs-executables/linux/
- 我们的环境可执行文件是一个 zip 文件。
- 我们需要下载它并将其放置到
./training-envs-executables/linux/ - 我们使用 Linux 可执行文件,因为我们使用的是 Colab,而 Colab 机器的操作系统是 Ubuntu (Linux)
我们使用 wget 从 https://huggingface.co/spaces/unity/ML-Agents-Pyramids/resolve/main/Pyramids.zip 下载了 Pyramids.zip 文件
wget "https://huggingface.co/spaces/unity/ML-Agents-Pyramids/resolve/main/Pyramids.zip" -O ./training-envs-executables/linux/Pyramids.zip解压它
unzip -d ./training-envs-executables/linux/ ./training-envs-executables/linux/Pyramids.zip确保您的文件可访问
chmod -R 755 ./training-envs-executables/linux/Pyramids/Pyramids修改 PyramidsRND 配置文件
- 与第一个自定义环境不同,Pyramids 是由 Unity 团队制作的。
- 因此 PyramidsRND 配置文件已经存在,位于 ./content/ml-agents/config/ppo/PyramidsRND.yaml
- 你可能会问 PyramidsRND 中为什么有“RND”。RND 代表随机网络蒸馏,这是一种生成好奇心奖励的方法。如果你想了解更多,我们写了一篇文章解释这项技术:https://medium.com/data-from-the-trenches/curiosity-driven-learning-through-random-network-distillation-488ffd8e5938
对于本次训练,我们将修改一个地方
- 总训练步数超参数太高了,因为我们只需 1M 训练步即可达到基准(平均奖励 = 1.75)。👉 为此,我们转到 config/ppo/PyramidsRND.yaml,并将 max_steps 更改为 1000000。

作为一项实验,您还应该尝试修改一些其他超参数。Unity 在此处提供了非常好的文档,解释了每个超参数。
我们现在准备训练我们的代理 🔥。
训练代理
训练将花费 30 到 45 分钟,具体取决于您的机器,去喝杯 ☕️,您值得拥有 🤗。
mlagents-learn ./config/ppo/PyramidsRND.yaml --env=./training-envs-executables/linux/Pyramids/Pyramids --run-id="Pyramids Training" --no-graphics将代理推送到 Hugging Face Hub
- 现在我们已经训练好了代理,我们准备好将其推送到 Hub,以便在您的浏览器中可视化它玩游戏 🔥。
mlagents-push-to-hf --run-id= # Add your run id --local-dir= # Your local dir --repo-id= # Your repo id --commit-message= # Your commit message观看您的代理玩游戏 👀
👉 https://huggingface.co/spaces/unity/ML-Agents-Pyramids
🎁 额外:为什么不在另一个环境上训练呢?
现在您已经知道如何使用 MLAgents 训练代理了,为什么不尝试另一个环境呢?
MLAgents 提供了 17 种不同的环境,我们正在构建一些自定义环境。最好的学习方法是自己尝试,玩得开心。
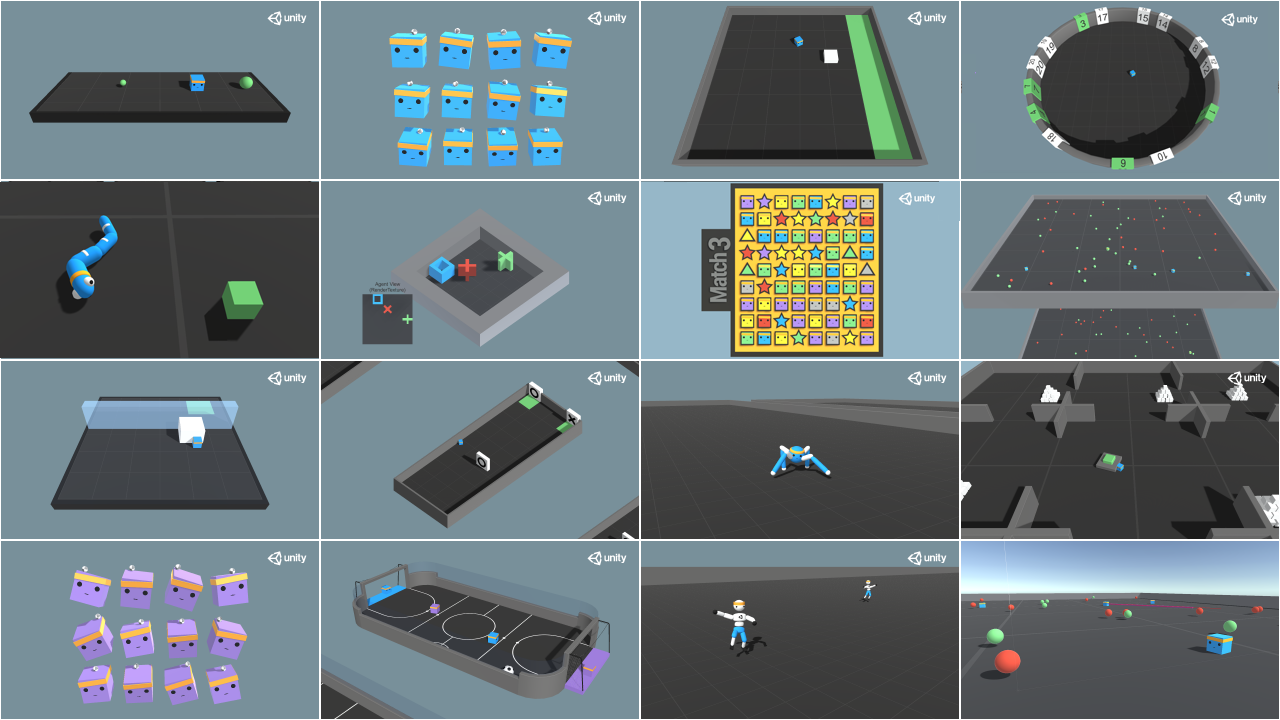
您可以在 Hugging Face 上找到当前所有可用环境的完整列表 👉 https://github.com/huggingface/ml-agents#the-environments
对于演示,您可以可视化您的代理 👉 https://huggingface.co/unity
目前我们已集成
今天就到这里。恭喜您完成本教程!
学习的最佳方式是实践和尝试。为什么不尝试另一个环境呢?ML-Agents 有 18 种不同的环境,但您也可以创建自己的环境。查看文档并尽情享受吧!
单元 6 见 🔥,